ADVERTISEMENT:
How to Draw Jasper from Steven Universe Step-by-Step Tutorial
Jasper now resides in the Burning Room. Learn how to draw Jasper from Steven Universe in 10 easy steps. Follow along and draw with me!
Step 1.

1. First off all, we draw the guidelines which will help at further steps. Draw an ’L’ shape in the middle of your paper just slightly bent to your left side. This gives the shape of the head. Pull a line parallel to the stem of the ’L’.
Step 2.
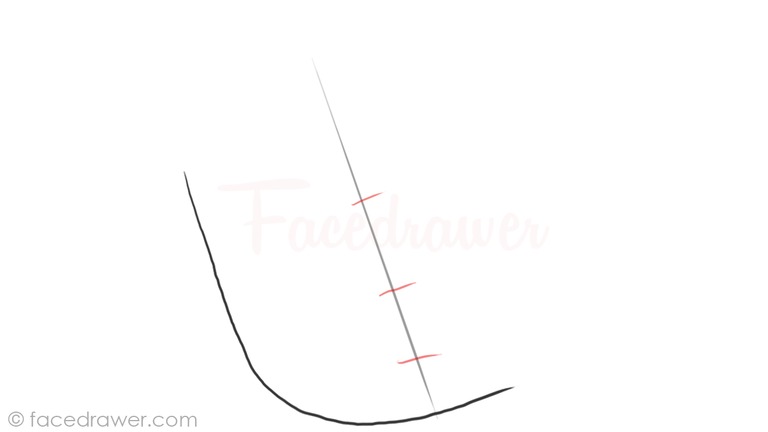
2. Divide the middle guideline to 4 blocks with 3 vertical lines. These lines will help to place the facial features (eyes, mouth…) of Jasper.
Step 3.
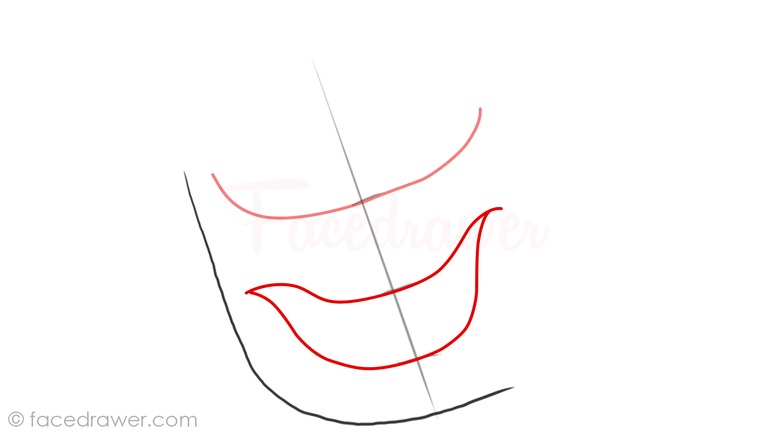
3. First, let’s do the mouth. Using the bottom guideline we just drew at step 3, draw a horn-like shape. Connect the two upper points of this horn with a line following the curves of the lower line. Now it kind of looks like a boat, doesn’t it? Use the top guideline to draw a bowl-like line. We will place the eyes on this guideline.
Step 4.
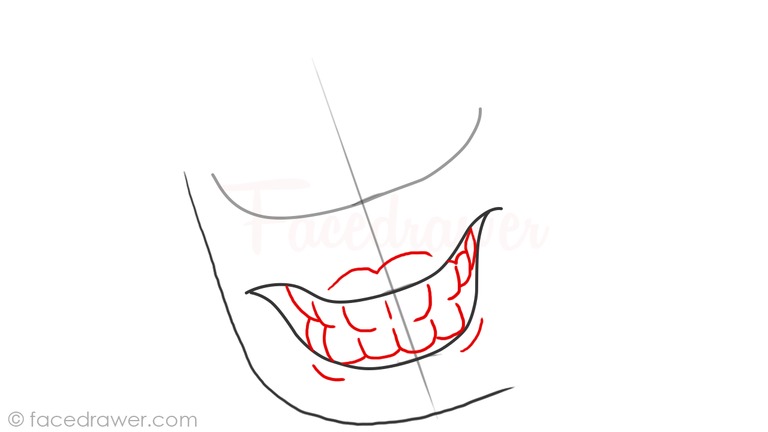
4. Let’s make that mouth more detailed! Draw a light horizontal line in the middle of the mouth so we can separate the dentures. For the teeth just draw little ’L’ shapes. The bottom line of the ’L’ should always point to the middle. Draw two small lines under the mouth and also two connected above it. It makes Jasper’s look more precise.
Step 5.
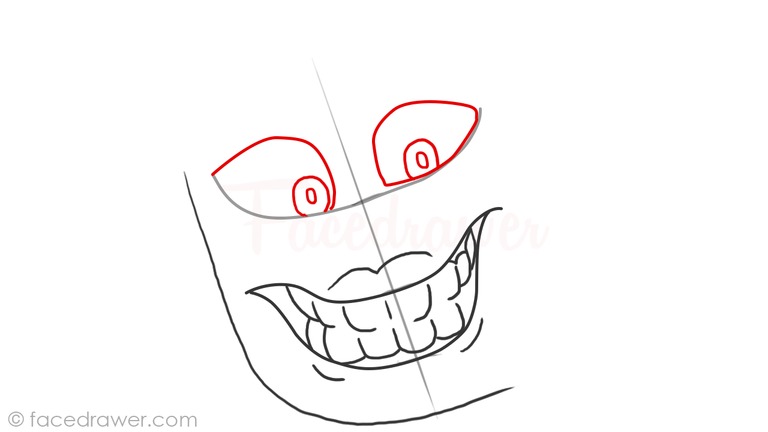
5. Let’s move on to the eyes. Shape the left eye with the help of the guideline. Draw a circle at the bottom of the eye close to the middle corner and also a small one into it. Do the same on the opposite side.
Step 6.
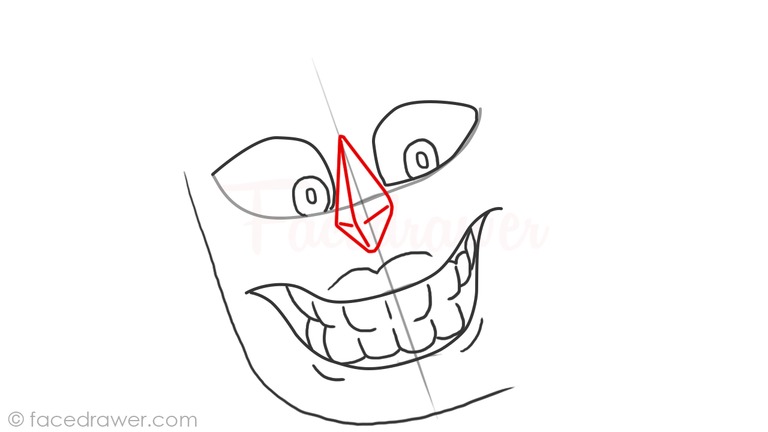
6. Draw a kite or a deltoid shape (whichever is easier for you to imagine the shape) between the eyes. Connect the corners of the opposite sides with a line. The lines should crack a bit, so it gives the nose a spatial look.
Step 7.
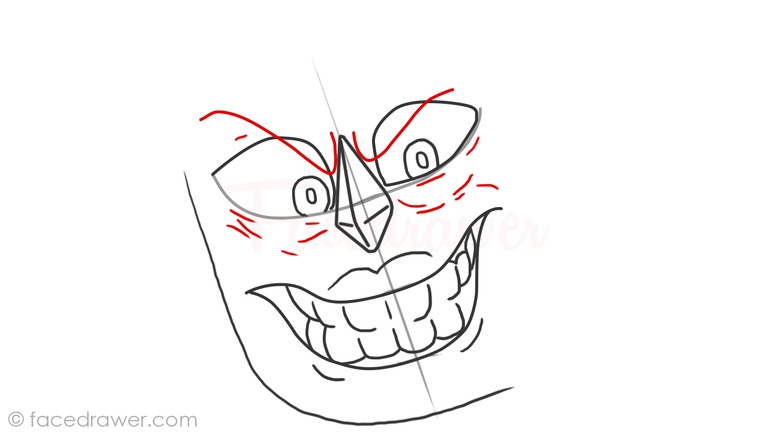
7. Pull two lines from the nose above Jasper’s eyes for the eyebrows. Also, draw some lines under the eyes as they will be the wrinkles. All these small details give an angrier look to Jasper from Steven Universe.
Step 8.
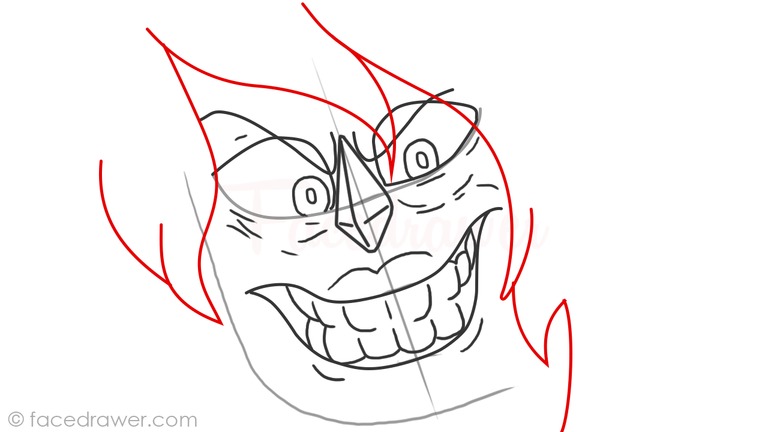
8. Fort he last detail draw the hairline. It should go on both sides and a little bit into the eyes. If you’re finished move to the last touch ups.
Step 9.

9. Contour the drawing. Only contour what is important to highlight Jasper and just simply erase the remaining e.g. guidelines. To make sure use the video or the photo above.
Step 10.
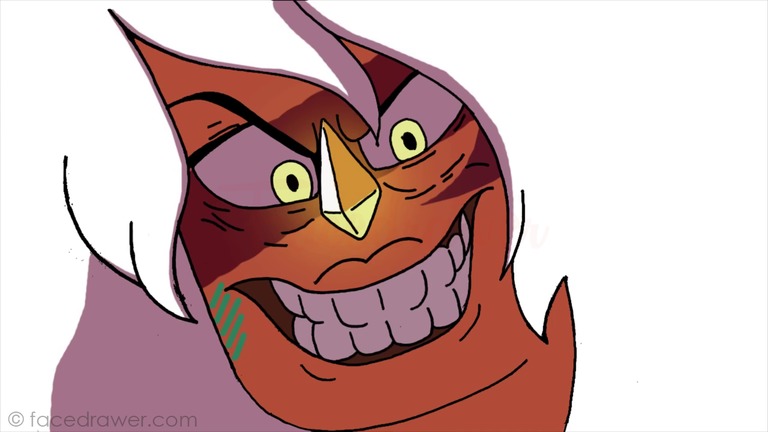
10. Finally, let’s color Jasper. You can use the colors I’m using or use any kind of colors or techniques you would like. And here we are, finished! Please, don’t forget to send me a photo of your drawing so I can post it on the Facedrawer Facebook page. Thanks for drawing with me!
Learn how to draw other Steven Universe Characters.
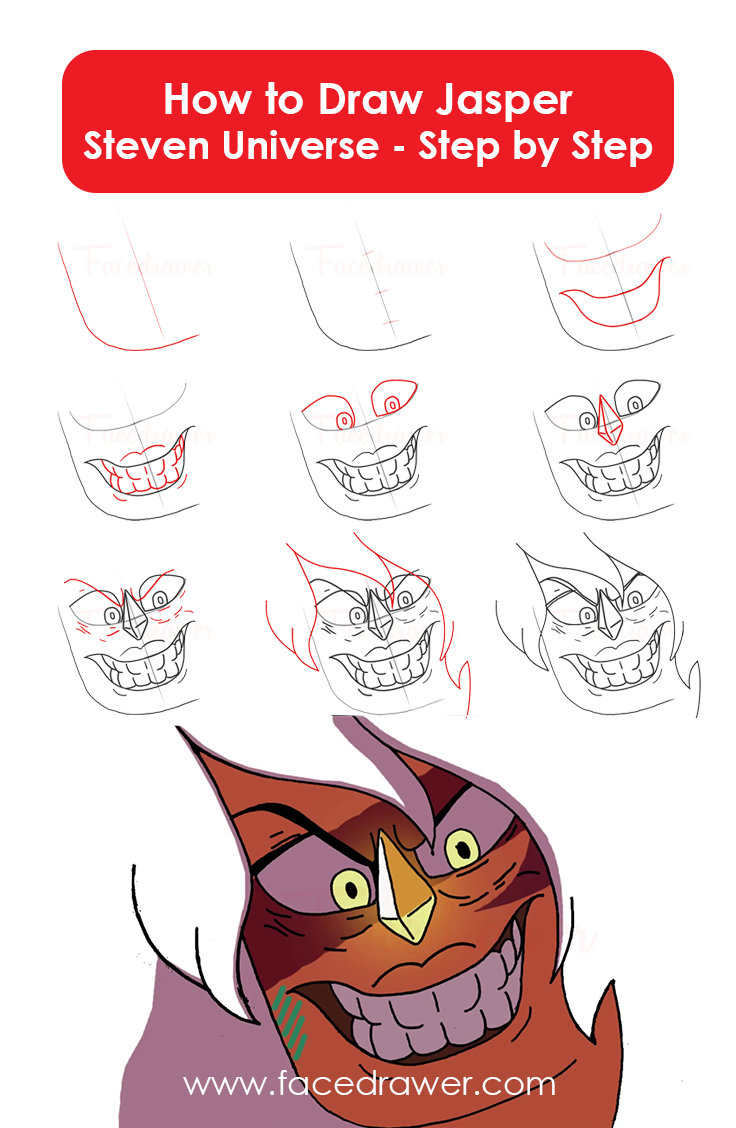
Visit the Jasper Step by Step Drawing Lesson Infographic
ADVERTISEMENT: