ADVERTISEMENT:
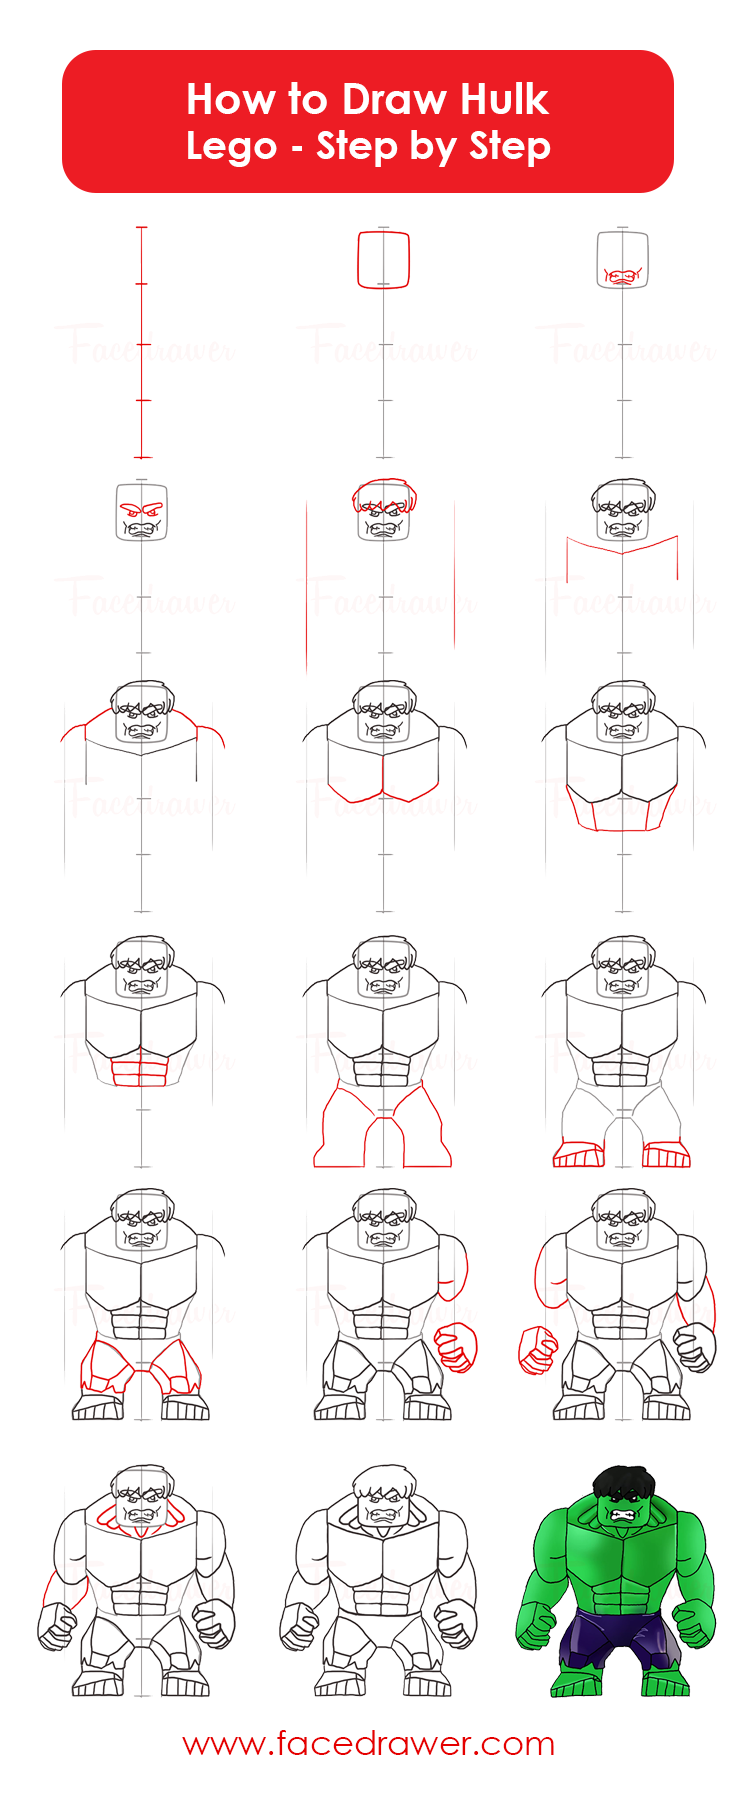
How to Draw Lego Hulk Step by Step Tutorial
Learn how to draw Lego Hulk from Marvel in these easy 18 steps. Draw it just as you could see it in the Marvel series. Let’s get it started!
Step 1.
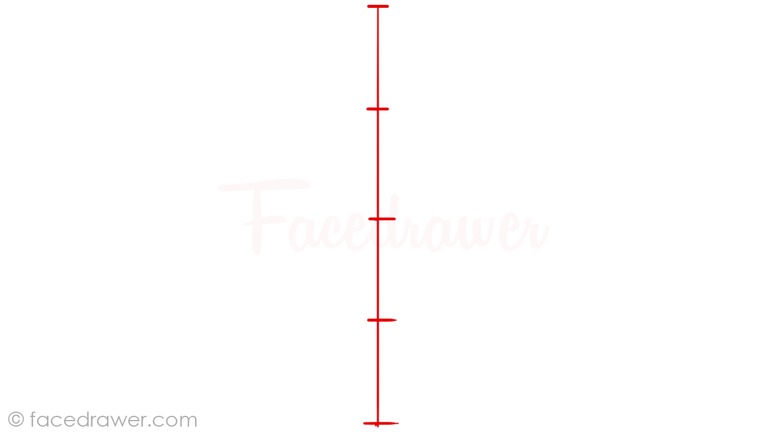
1. First of all, draw a line across your paper and divide it into 4 even parts with 5 horizontal lines.
Step 2.
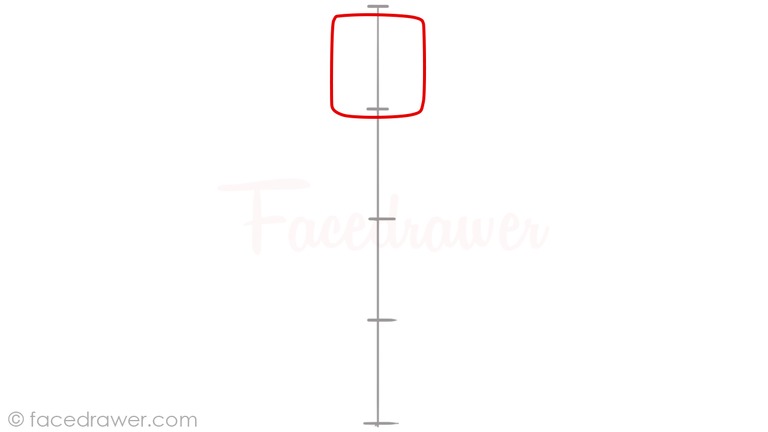
2. Now, connect the top guideline with the one under, so the lines make up a square. Divide this square with a horizontal guideline in the middle. This line will help to place the eyes correctly.
Step 3.
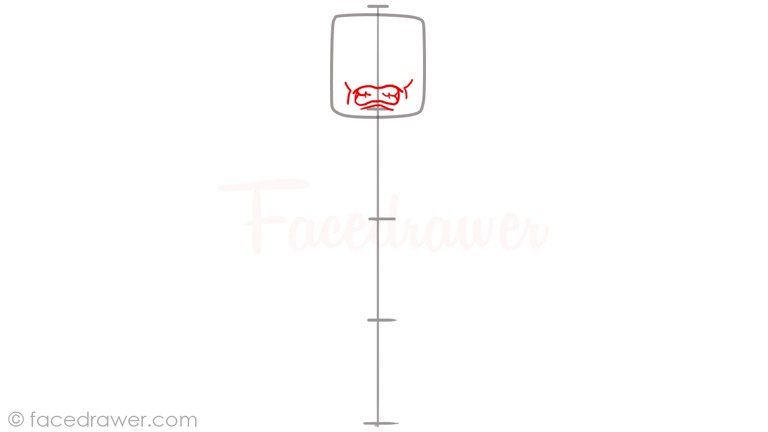
3. Let’s continue with adding the details of Lego Hulk’s face. Draw the mouth just above the bottom of the head. It should look like an angry mouth with the teeth tightly clenched. Add more lines under and alsoon the two sides of the mouth for a result of an angry look.
Step 4.
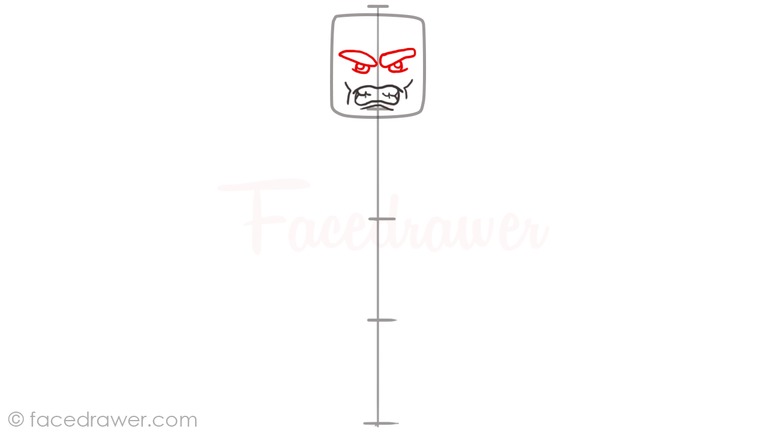
4. For the eyes draw two circles under the guideline we drew at step 2. Add two thick and big eyebrows pointing to the middle. To make an angrier look, just stroke two thin line from the bottom of the eyes in an angel.
Step 5.
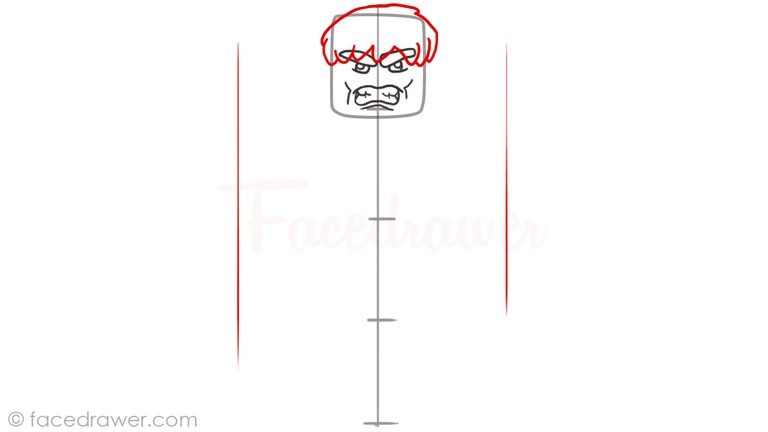
5. Finishing the details of the head, draw the hairline. For that just make the upper part of the square more rounded and draw a kind of zigzag line for the lower hairline. Leave the eyes out so it will be visible. Now it already looks like a Lego figure, doesn’t it? Add two guidelines on the two sides in the same distance from the middle line and also on the two sides of the head.
Step 6.
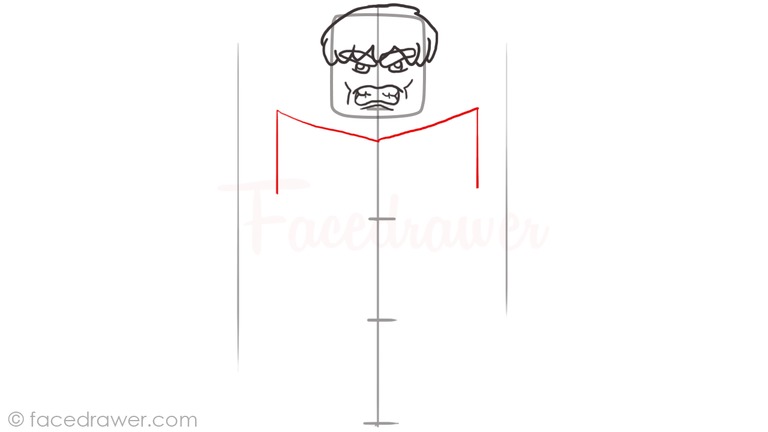
6. Making the body of Lego Hulk draw an ‘M’ shape. This will help us placing the shoulders.
Step 7.
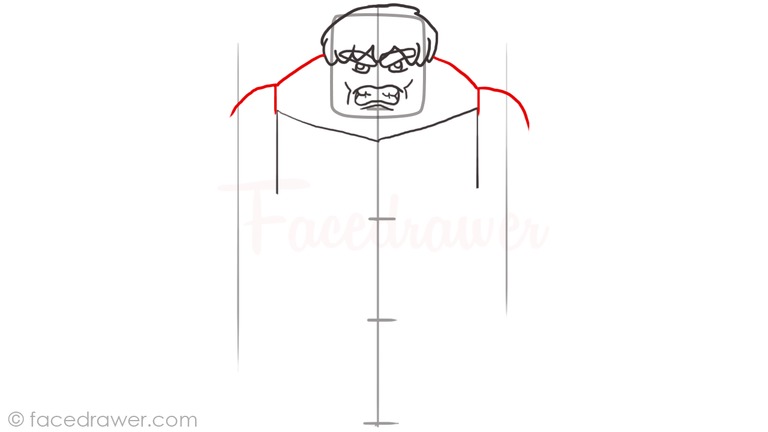
7. On the top of the guideline just draw the shoulders. Since Lego Hulk is very muscular draw them big, almost like a you would draw hills or a cloud.
Step 8.
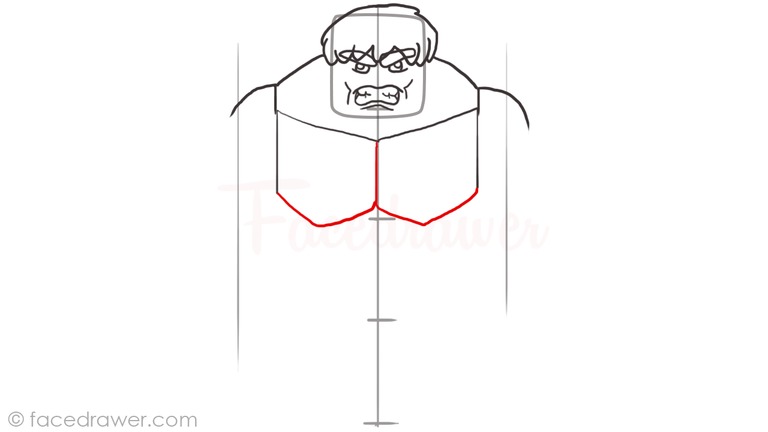
8. Draw a ‘V’ shape using the guideline we drew at Step 1. Repeat it on the opposite side.
Step 9.
9. Preparing the abs draw line on the side bringing it slightly to the middle. Draw another one from the bottom of the ‘V’ shape just a bit lower than the one before. Connect the lines which should go a bit upwards from the middle to the outer line. Connect it also to the middle guideline. Make the same on the opposite side.
Step 10.
10. Let’s bring those sixpacks out! For the look just draw to lines on each sides of the abdomen. This Marvel figure is getting to look though!
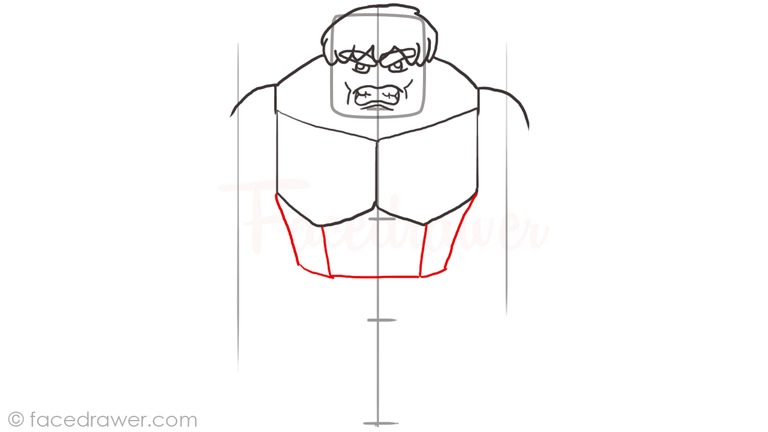
Step 11.

11. Now we move on to the legs. First of all, draw a ‘V’ shape under the abdomen. Pull down a line towards the sides, break it in an angle and pull it straight down. Follow this shape for the inner side of the leg and repeat the same on the opposite side.
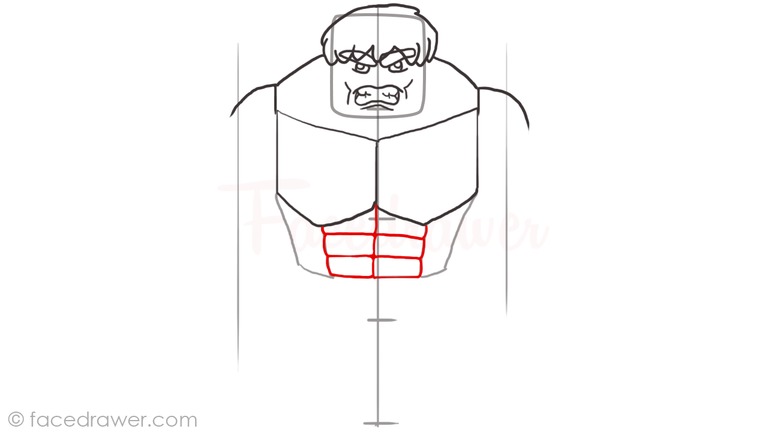
Step 12.

12. Draw vertical lines from the middle to the out, first longer then shorter. Connect them with a line above and draw a horizontal line above this. Do it on both legs.
Step 13.
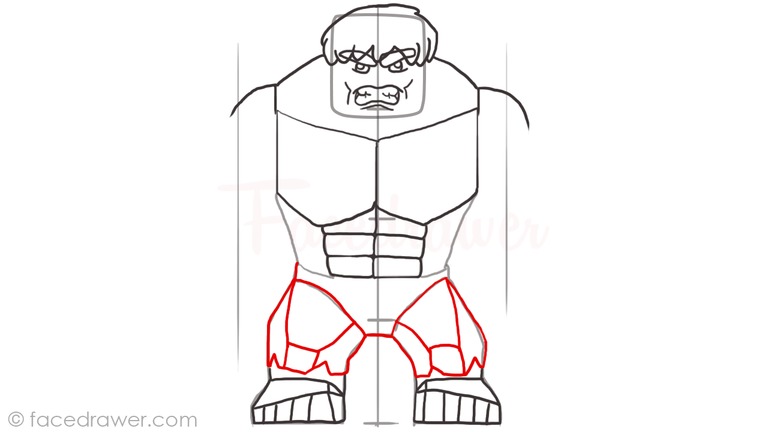
13. For detailing the leg, make a ‘cat head shape’ above the feet. Draw a square on top of it and pull two lines out of the top corners towards the hip. These details help to make a more precise look of this Marvel figure.
Step 14.
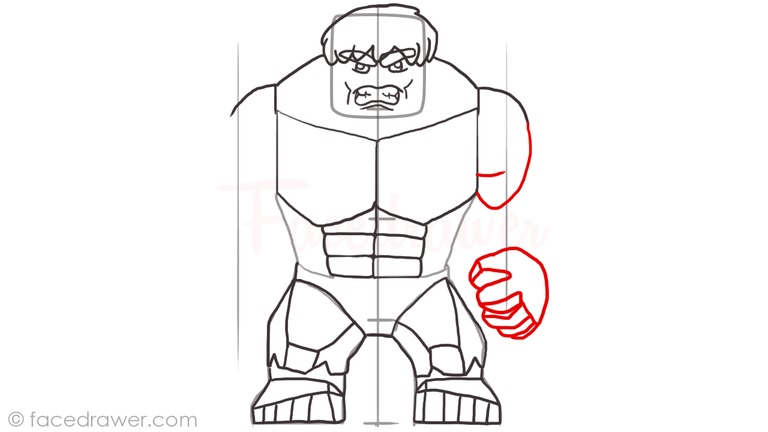
14. Getting to the end of the figure let’s make the arms. Starting with the right side first draw a ‘D’ shape for the biceps. Draw a light circle under and form the fingers inside it. The hand should look like as a big fist. Remember, Lego Hulk has an angry, though look. The lines should always be angled, never curved.
Step 15.
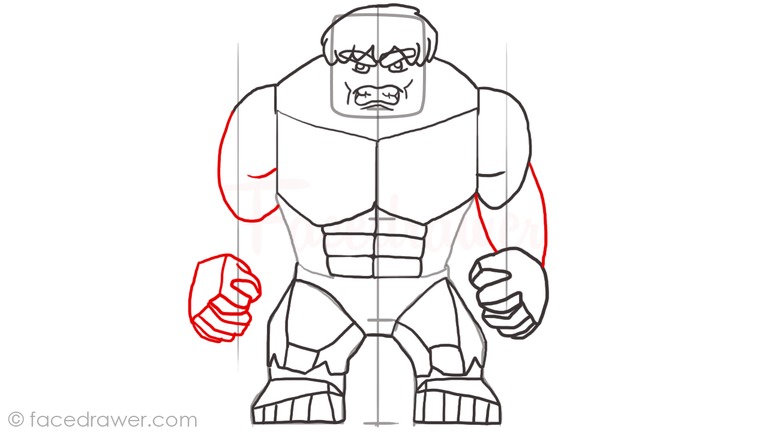
15. Do the same on the opposite side. Connect the biceps and the hands with two curved lines.
Step 16.
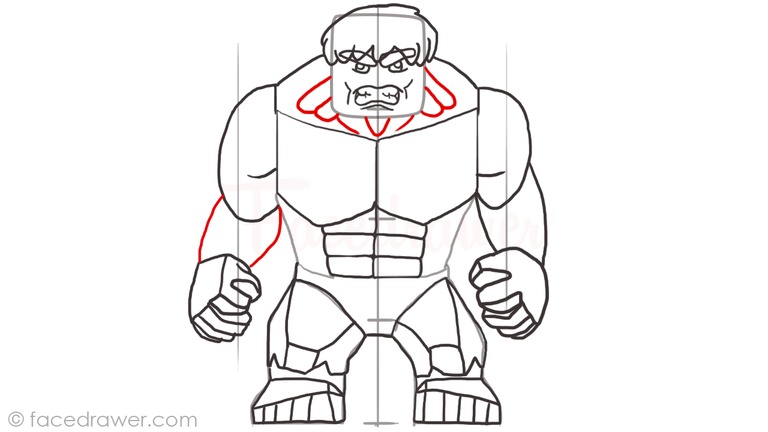
16. Before getting to the final step add more details on the neck of Lego Hulk. You can see it on the photo.
Step 17.
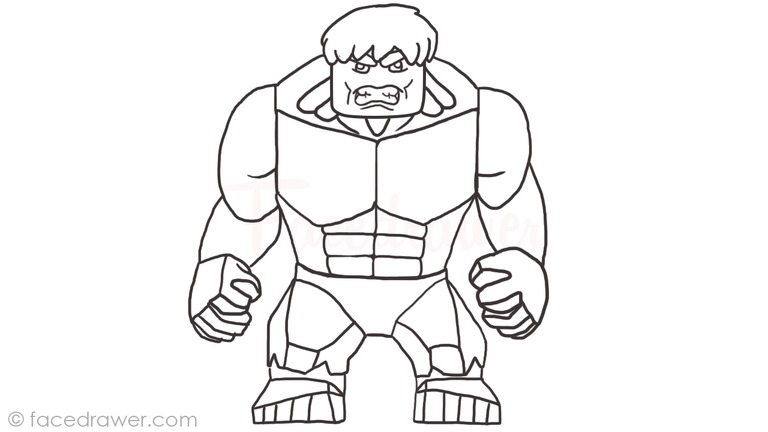
17. Contour the important parts and erase the remaining. If you’re not sure about how to do it, take a look at either the video or the photo above.
Step 18.
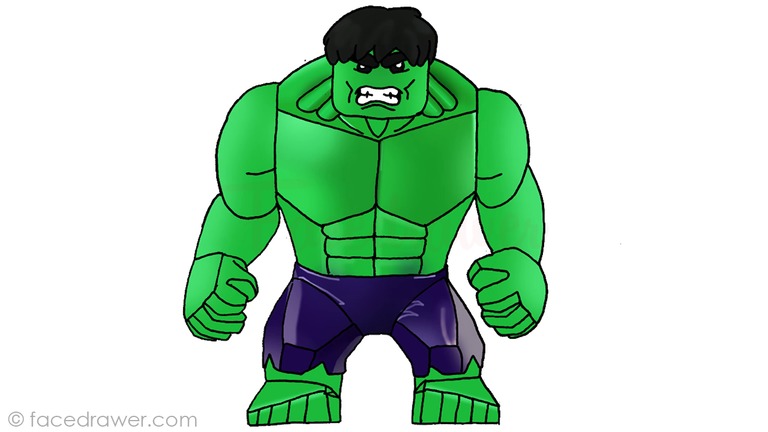
18. And finally, let’s colour. Use either the colours I’m using or use the colours or technique you would like to. Never be afraid to use your own imagination for your own taste. Don’t forget this is just a sample. If you’re finished, please take a photo of your drawing and send it to me, so I can post it on the Facedrawer Facebook page. Thanks for drawing with me!
Visit other Lego Character Drawing Lessons here.
Check the Lego Hulk Step by Step Drawing Lesson Infographic
ADVERTISEMENT: