ADVERTISEMENT:
How to Draw Onix from Pokemon Step by Step Tutorial
Onix is a rock snake looking character from Pokemon. In these 12 easy steps you can learn how to draw Onix known from Pokemon and the adventures game of Pokemon Go. Let’s get started!
How to draw Onix Step 1

1.First of all draw a hook shape which gives the ’spine’ of Onix. At the end of it, draw a circle for the head.
Step 2.
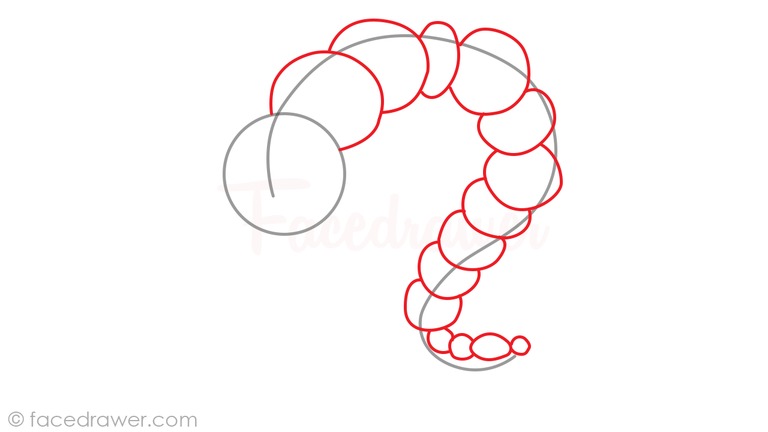
2. By continuing our drawing, add more circles in different sizes and shapes coming from the head to the tale. As you can see the shapes of these circles sometimes more oval the other times more round.
Step 3.
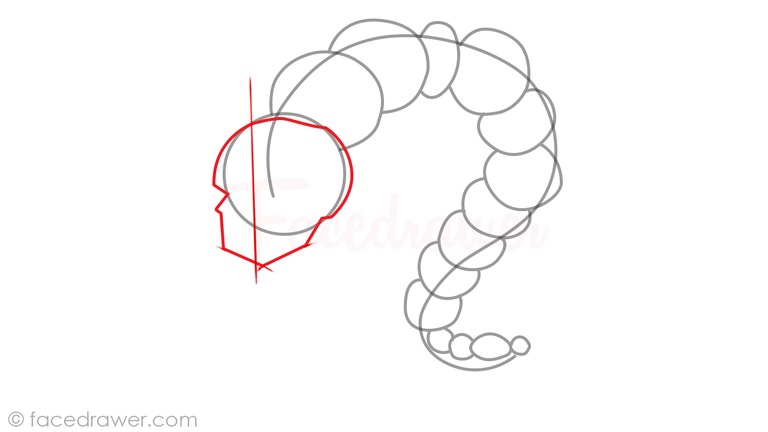
3. Now let’s start making the head’s details. First of all, add a guideline as it would cut off a piece of the head. Continuing, outline the head’s rocky shape. Just draw a trapeze geometrical shape which connects to the head.
Step 4.
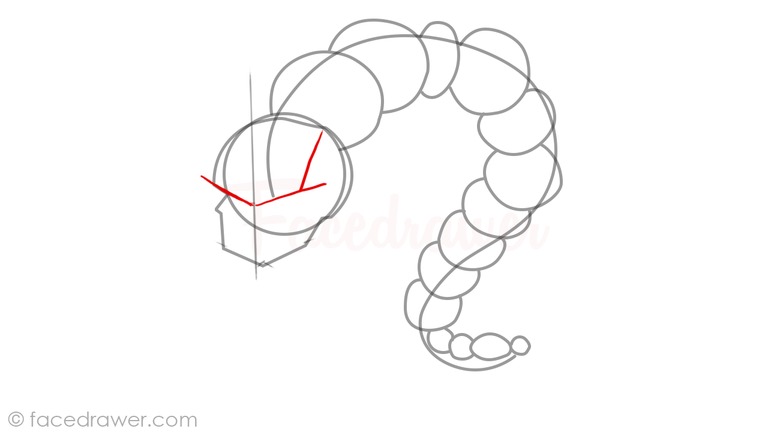
4.Continuing Onix’s head, draw the forehead on the top of the head just like on the photo above.
Step 5.
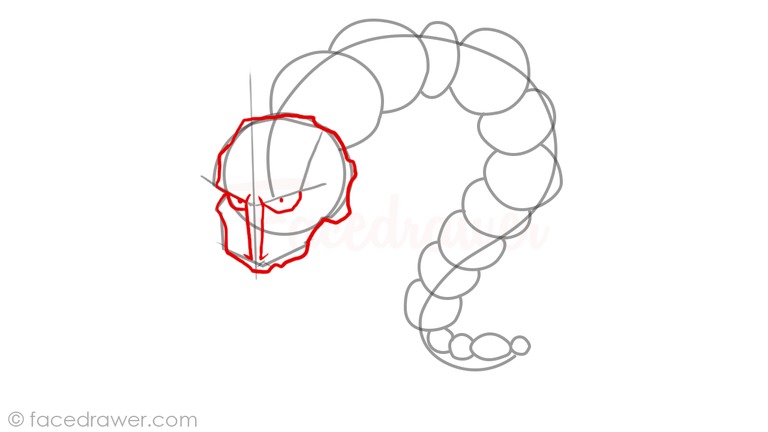
5.Furthermore let’s add the eyes under the previously drawn guideline. The half circle shape of the eyes gives a kind of an evil look to ourPokemon hero. Also, draw the nose. It almost looks like the legs of a stick figure.
Step 6.
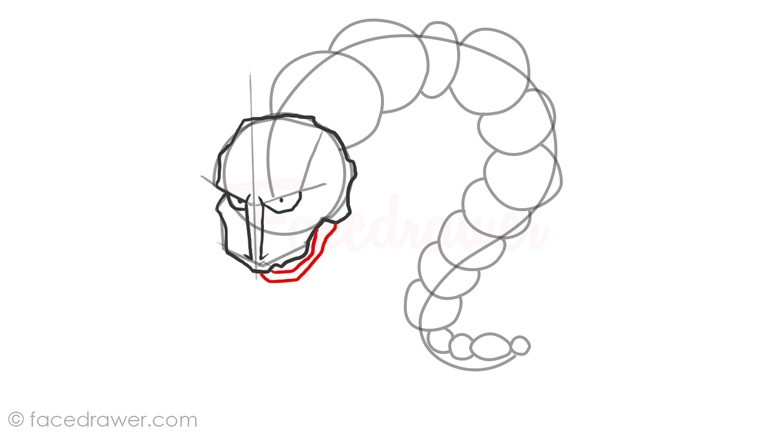
6. Finish drawing the jaw and the chin. Since Onix is a rocky snake don’t be afraid to use sharper, more angular lines.
Step 7.
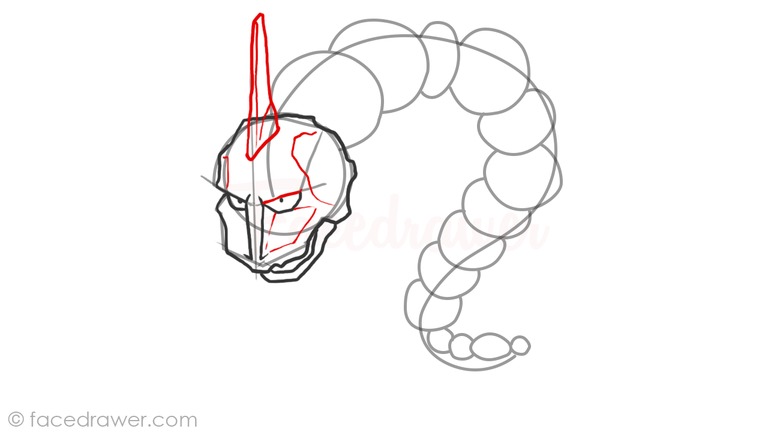
7. Finishing the head just add some lines which will make the face look more rocky and tough and finally draw the horn on the top of the head. How is it looking?
Step 8.
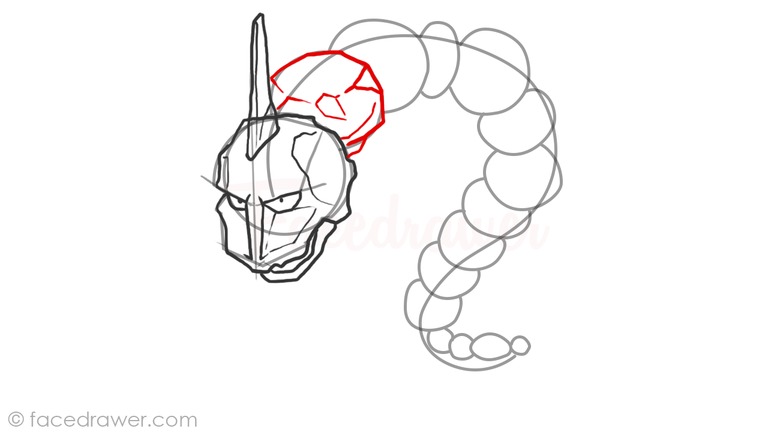
8.From now you will probably need to take your time. Start shaping the first circle on the body just like it was a rock. Add some lines and cracks on the circle. This is what gives the characteristic shape to Onix.
Step 9.
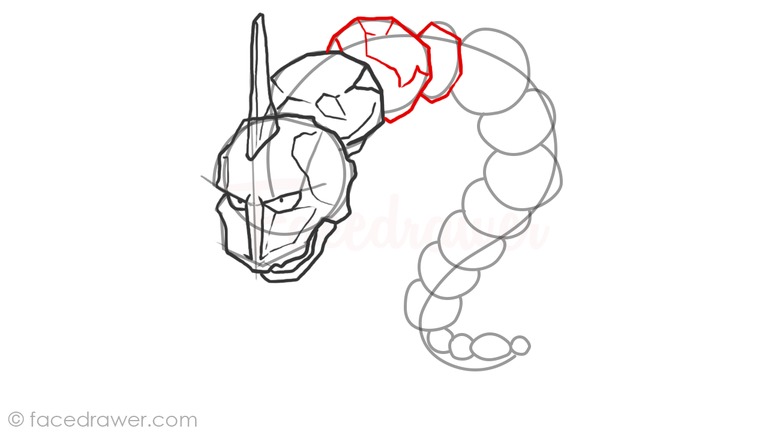
9. Just keep on drawing as you did with the first one. Don’t worry it will start getting easier. We’re almost there!
Step 10.
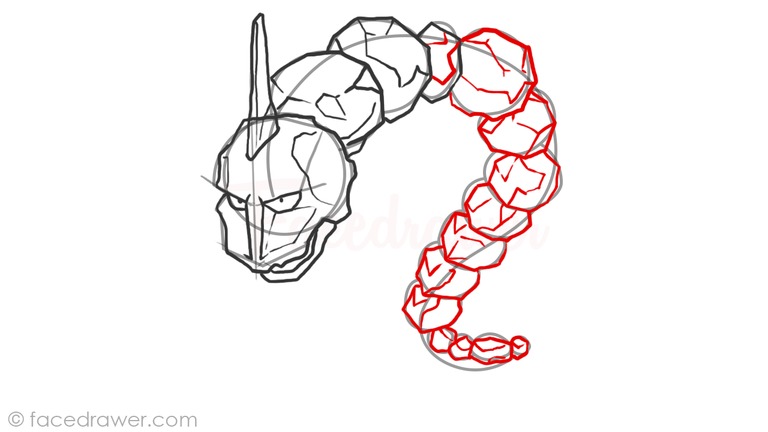
10. Just keep on going until you finally reach the last one. If you’re finished with that as well, move to step 11.
Step 11.
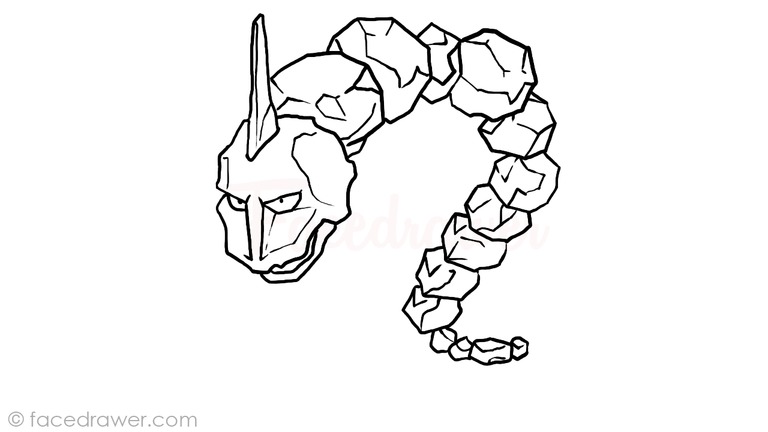
11. Before the final step, contour the main lines and erase the rest. If you’re not sure about what to contour and what to leave, you can always check my video or the photo above.
Step 12.
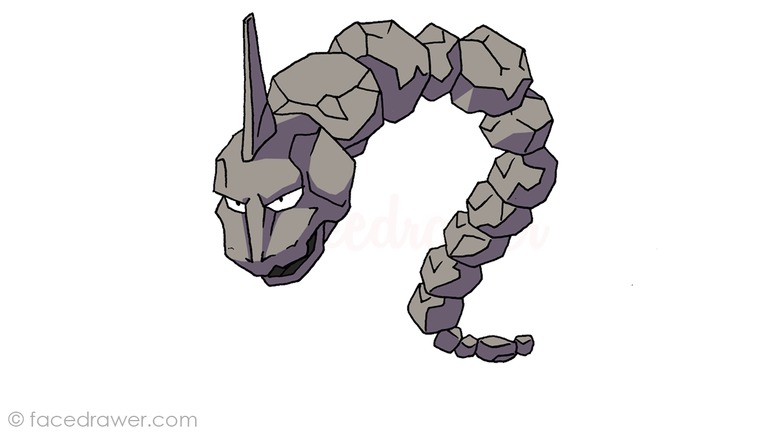
12. Let’s colour it! You can always use the colours and techniques I use in the drawing but also don’t hesitate to use your own creativity if you would like. After all, please don’t forget to send me a photo of your drawing, so I can share it on my Facedrawer Facebook page. Thanks for drawing with me! Have you seen the how to draw chibi pikachu drawing lesson?
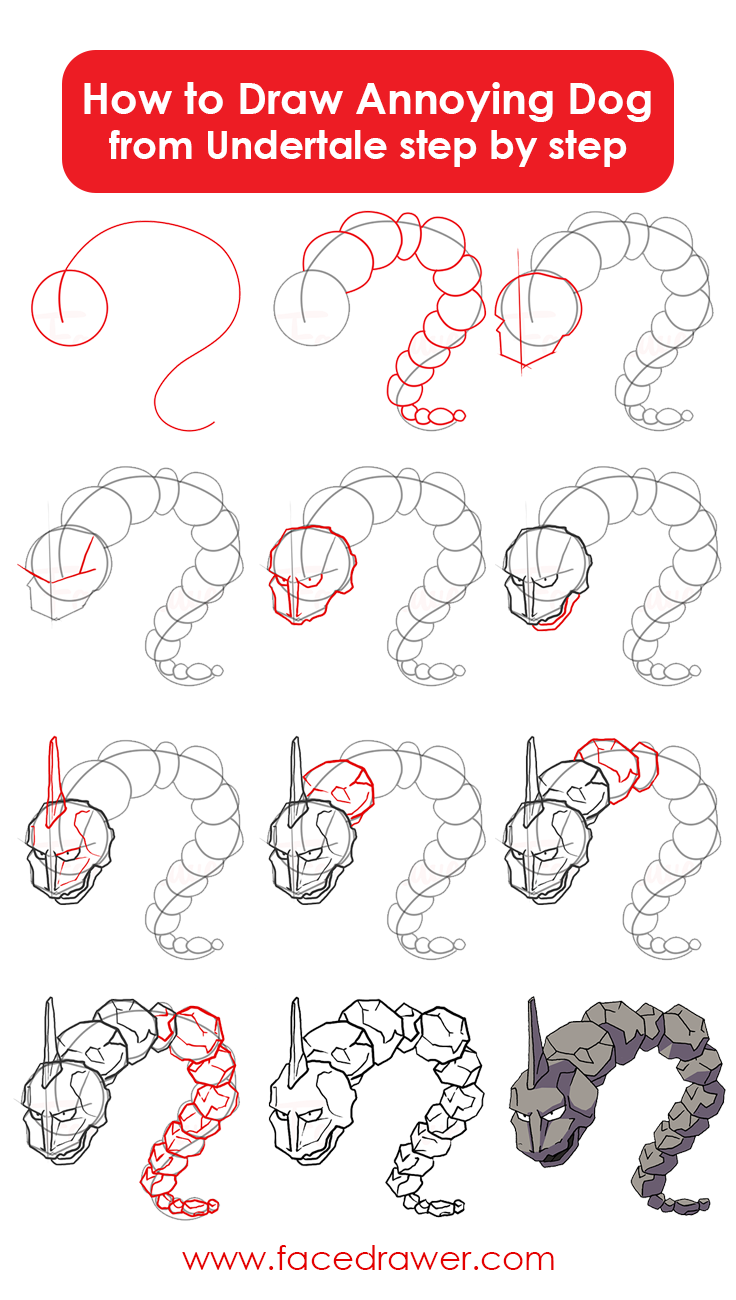
And here is the Infographic
ADVERTISEMENT:


[…] Draw Onix Art Lesson for Kids […]
[…] How to Draw Onix Art Lesson for Kids […]